mirror of
https://github.com/gusmanb/SerialPortBridge
synced 2026-07-21 02:43:43 +00:00
No description
- C# 98.5%
- C 1.3%
- Shell 0.2%
| Filename | Latest commit message | Latest commit date |
|---|---|---|
| Installer | ||
| SerialLinuxHost | ||
| SerialManager | ||
| .gitattributes | ||
| .gitignore | ||
| BaudSetter.c | ||
| install_daemon.sh | ||
| README.md | ||
| SerialPortBridge.sln | ||

SerialPortBridge
Small set of tools to connect serial ports from a Raspberry to a Windows machine. I created this program because I wanted to use my raspberry as 3D printer / CNC server and no software worked as I wanted.
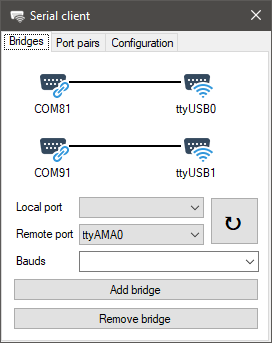
Compilation:
- Open solution in VS, compile the SerialClient (Windows app).
- Open a command line console and execute the
publish.batfile under SerialLinuxHost, it will create the publication of the server for the Raspberry. - Copy
BaudSetter.cwherever you have installed the server publication - Compile with
gcc -o BaudSetter BaudSetter.c - Ready!
Windows requirements
You must install com0com.
If you did a full installation the Com0com path setting can be left empty and the client will locate it
Run as daemon in Raspberry/Raspbian
- Copy the
install_daemon.shscript to the folder where you have installed the serial host - Change it's permissions to executable:
sudo chmod 777 install_daemon.sh - Execute:
sudo install_daemon.sh - Reboot
Usage
- Enter at least the server address (and port 9025 if you haven't changed it in the server code) and save the configuration
- Create as many pairs as ports you want to connect, the input port will be used by your target app, the output port will be used by the serial manager. No need to specify baud rate.
- Create as many bridges as ports you want to connect selecting the output you want to connect to a remote port. You must specify the speed of the remote port.
- Ready!
An usage example
- Connected a CNC to the Raspberry, it creates the ttyUSB0 port.
- Configured the Serial Manager server as 192.168.1.10 9025
- Created pair COM2<->COM3
- Created bridge COM3<->ttyUSB0 with 115200 bauds
- On GrblControl CNC is configured to use COM2 at 115200 bauds
Now GrblControl will control the remote CNC.